Getting rid of stubborn belly fat can be challenging, but it's far from impossible. Achieving a slimmer waistline requires a balanced combination of healthy eating, regular physical activity, and consistent lifestyle habits. Incorporating the right exercises into your fitness routine can help burn calories, strengthen your core, and reduce excess abdominal fat over time. According to the AARP, carrying excess belly fat is linked to a higher risk of heart disease, type 2 diabetes, stroke, and certain types of cancer (1). In this guide, you'll discover the most effective exercises to reduce belly fat at home, practical expert tips for long-term success, and the best workouts to help women burn belly fat more efficiently.
16 Best Exercises To Lose Belly Fat
That pesky belly fat can be a real health problem in addition to being a fashion woe. It increases susceptibility to cardiovascular diseases, type 2 diabetes, and certain malignancies. But don’t worry, you can fight back! The key is to combine exercise and a healthy diet. By making smart choices and staying active, you can shed those unwanted pounds and improve your overall health.
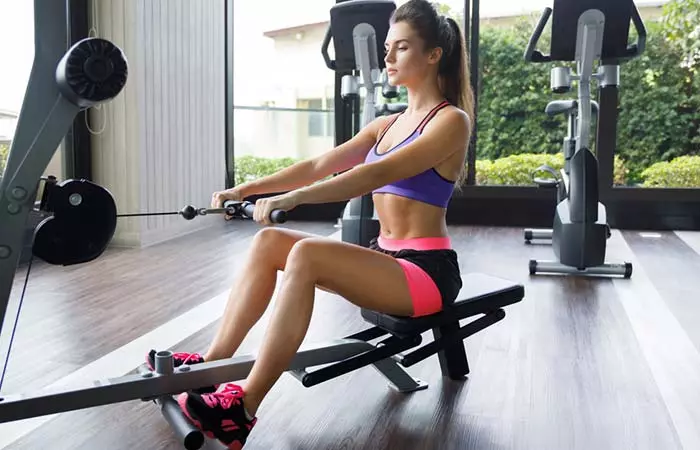
There are many belly fat exercises you can do to shed that stubborn weight. Some of them require you to venture outside or head to the gym, while some can be performed in the comfort of your home. If you are wondering how to get rid of a belly pooch specifically, incorporating high-intensity interval training (HIIT) and cardio exercises like running and cycling into your routine can be particularly effective.
Certified Personal Trainer TJ Mentus says, “Cardio and aerobic exercise are great for improving your overall health — especially heart health — and burn calories both during and after the workout. So it is good for weight loss overall. But I would also say whether they help lose belly fat specifically depends on a person’s genetic predisposition to hold fat in certain places. No activity can guarantee that belly fat would be the first to go or the main area of weight loss.” Thus, if you’re wondering how to lose belly fat with exercise, add an appropriate combination of strength training and cardio to your fitness routine, but manage your expectation accordingly.
Exercise and diet affect each of our bodies differently. Besides our body type and metabolism, several other factors might be at play. For instance, our body’s circadian rhythm! The results from a study that aimed to show how the timing of exercise sessions impacts weight loss across a 10-month period found that there is a significant difference between training in the morning than in the afternoon or at night time. Check out the following graph.

The Gradual Effects Of Exercising On Body Weight Across 10 Months
| Moths | Controls | Late-Ex | Sporadic-EX | Early-Ex |
|---|---|---|---|---|
| 0 | 0 | 0 | 0 | 0 |
| 3.5 | 0 | -1.2 | -0.8 | -2.5 |
| 7 | 1.2 | -1.9 | -3.8 | -7 |
| 10 | 1.6 | -1.9 | -5.2 | -8 |
Some of the best exercises to lose belly fat include bodyweight workouts like push-ups and squats, as well as using resistance bands or weights. Although these exercises can play a major role, it’s crucial to pay attention to other aspects of your life for the best outcomes. While there’s no one sustainable answer to how to lose belly fat fast, a rigorous exercise regime and a healthy diet can surely help.
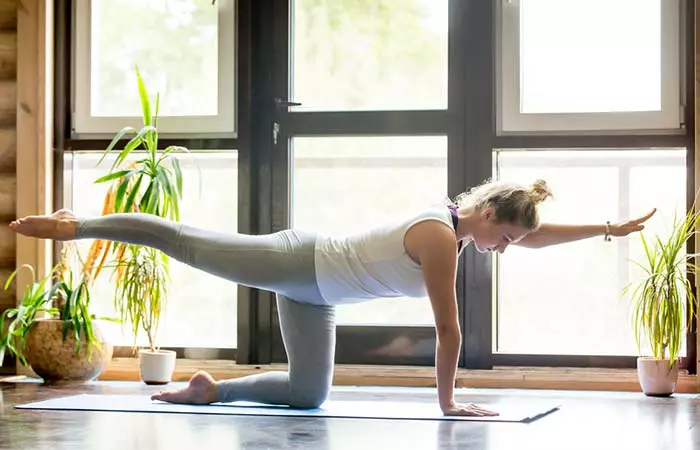
A study published in the British Journal of Sports Medicine explored effective and safe abdominal exercises for targeting belly fat and strengthening the abdominal muscles. It emphasized the importance of exercises like the trunk curl while discouraging those that stretch the lumbar spine beyond its natural limits, such as sit-ups with foot fixation and bilateral straight leg raises (2). Here is a collection of easy-to-perform exercises with pictures that help effectively reduce belly fat for females at home. Always remember to warm up for 10 minutes before starting these belly fat-reducing exercises. After your muscles are warmed up, take a 10-second break and start with the following exercises:
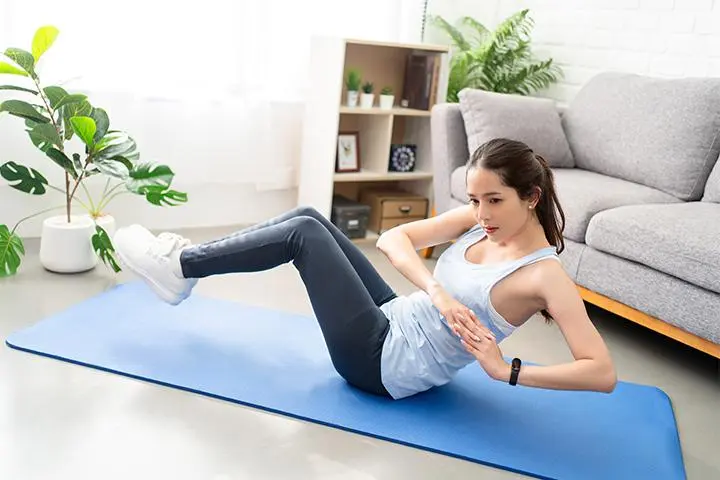
1. Lying Leg Raises
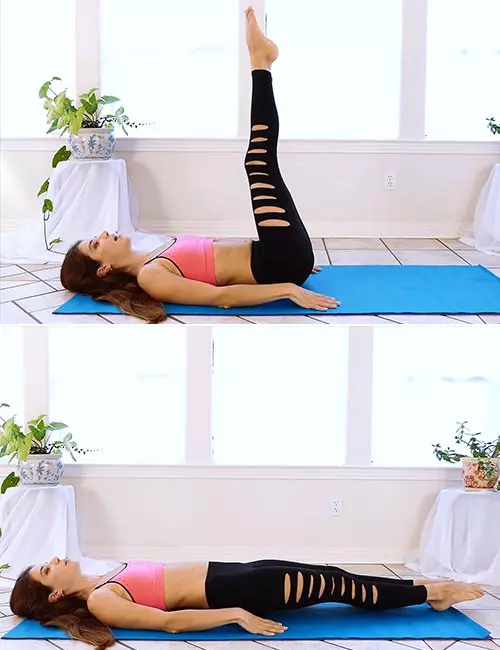
Some of the best flat abs exercises to reduce belly fat include the bicycle crunch, Russian twist, and leg raises. This exercise for belly fat engages the lower abdominal muscles and helps improve core stability. This is a helpful exercise to reduce belly fat for females at home. Those who prefer working out at home can do it by lying on a mat and lifting both legs simultaneously.
Target – Lower abs, upper abs, glutes, hamstrings, and quads.
How To Do
- Lie down on a mat. Place your thumbs under your hips, palms flat on the floor. Lift your feet off the floor a little, look up at the ceiling, and engage your core. This is the starting position.
- Raise both your legs to 90 degrees and slowly bring them back down.
- Right before touching the floor, raise your legs again. Do 3 sets of 15 reps.
Frequency: Perform 3-4 times per week.
Alternatives:
- Beginner: Perform knee raises instead, lifting knees to a 90-degree angle.
- Intermediate: Add ankle weights for extra resistance.
- Advanced: Combine it with a reverse crunch for an added core challenge.
What Not To Do
– Do not place your feet completely on the floor or push your hips up with your hands to lift your legs.
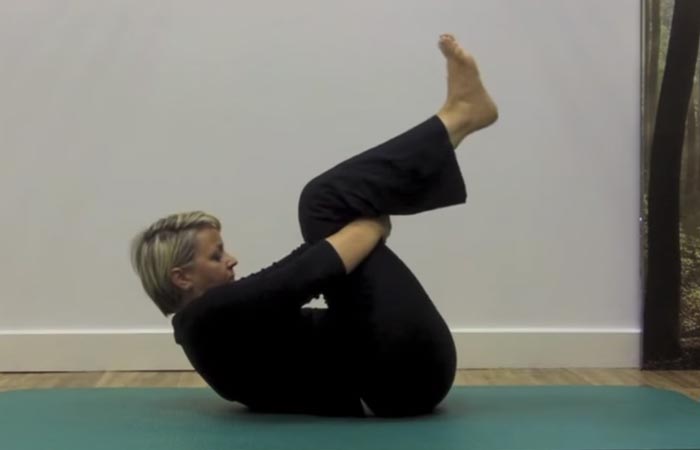
2. Leg In And Out
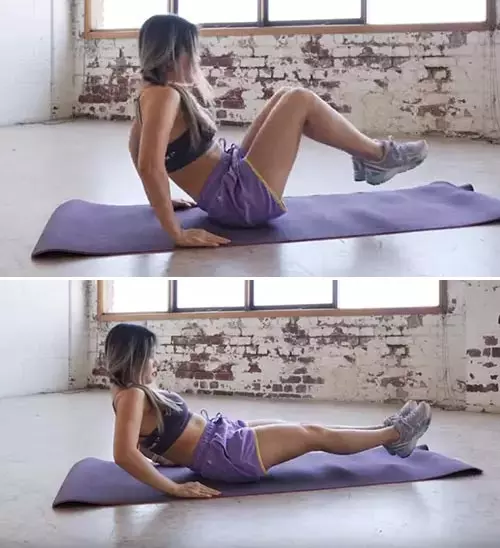
This is a simple yet effective exercise to reduce belly fat and target the upper and lower abs.
Target – Lower abs, upper abs, glutes, hamstrings, and quads.
How To Do
- Sit on a mat. Place your hands behind you, with the palms flat on the mat. Lift your legs off the floor and lean back a little. This is the starting position.
- Tuck both your legs in. Simultaneously, bring your upper body close to your knees.
- Go back to the starting position. Do 2 sets of 20 reps.
Frequency: Perform 3-4 times per week.
Alternatives:
- Beginner: Keep your feet on the floor and use only one leg at a time.
- Intermediate: Use a resistance band around your legs for extra difficulty.
- Advanced: Perform this exercise with the arms extended overhead for greater balance demand.
What Not To Do
– Do not place your hands too wide apart at the back.
3. Scissor Kicks
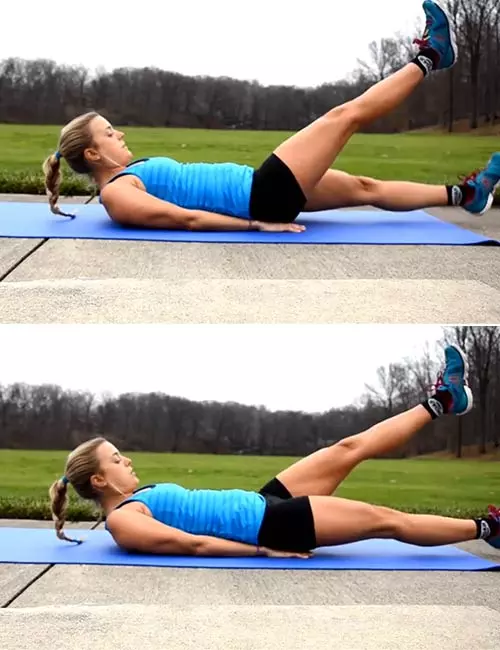
Perfect for targeting lower belly fat, scissor kicks are among the most effective exercises to lose belly fat.
Target – Lower abs, upper abs, glutes, hamstrings, and quads.
How To Do
- Lie down on a mat. Place your palms under your hips.
- Lift your head, upper back, and legs off the floor. This is the starting position.
- Lower your left leg. Just before it touches the floor, lift your left leg and lower your right leg.
- Do this 12 times to complete one set. Do 3 sets of 12 reps. Take a 20-second break before moving on to the next exercise
Frequency: Perform 4-5 times per week.
Alternatives:
- Beginner: Keep one foot on the floor while alternating the kicks.
- Intermediate: Perform the exercise at a slower pace to engage muscles deeper.
- Advanced: Add small weights to your ankles or pulse your legs closer to the ground.
What Not To Do
– Do not do this exercise quickly or hold your breath while doing it.
4. Crunches
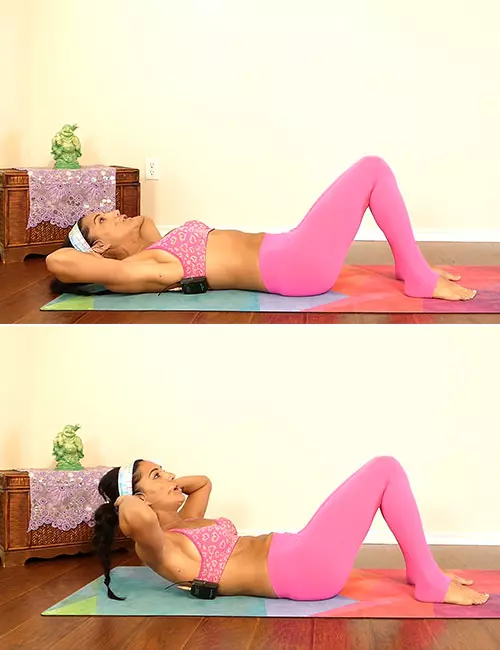
Crunches are the perfect answer to the question, what exercise burns the most belly fat for females.
Target –Lower and upper abs.
How To Do
- Lie down on a mat, flex your knees, and place your feet on the floor.
- Place a thumb at the back of each ear. Hold the back of your head with the rest of the fingers. Lift your head off the floor. This is the starting position.
- Initiate the movement by curling up and trying to reach your knees with your head.
- Go back to the starting position.
- Make sure you inhale while curling up and exhale while going down. Do 2 sets of 12 reps.
Frequency: Perform crunches 2-3 times per week to avoid strain on the neck and spine.
Alternatives:
- Beginner: Perform partial crunches, lifting only the head and shoulders.
- Intermediate: Hold a small weight plate against your chest while doing the exercise.
- Advanced: Combine crunches with a medicine ball twist for increased intensity.
What Not To Do
– Do not tuck your chin in.
Crunches can put stress on the spine and lead to back pain. These exercises may also cause neck and back strain.
5. Bicycle Crunches
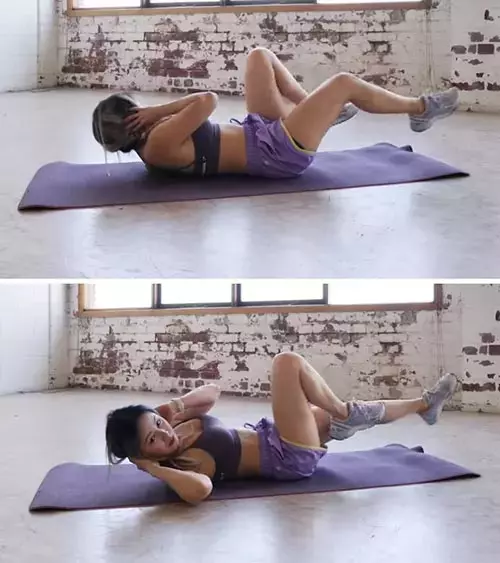
Target – Rectus abdominisi The ‘abs muscle’ or the six-pack that helps the body between the ribcage and the pelvis move. , obliques, glutes, hamstrings, and quads.
How To Do
- Lie down on a mat, flex your knees, and lift your feet off the floor.
- Place a thumb at the back of each ear. Hold the back of your head with the rest of the fingers. Lift your head off the floor. This is the starting position.
- Push your left leg down and extend it straight. Simultaneously, curl up and twist to your right. Try to touch your left elbow with your right knee.
- Curl back down and bring your left leg back to the flexed position.
- Do the same with the other leg. Do 2 sets of 12 reps. Take a 10-second break before doing the next exercise.
Frequency: Perform 3-4 times per week.
Alternatives:
- Beginner: Perform the exercise with your feet on the ground, alternating knee lifts.
- Intermediate: Increase the speed without compromising form.
- Advanced: Use ankle weights or a resistance band for increased intensity.
What Not To Do
– Do not hasten to complete the sets, and do not tuck your chin in.
6. Half Seated Reverse Crunch
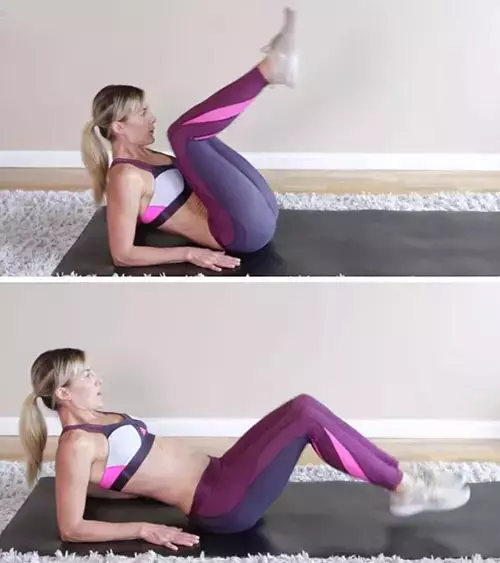
Target – Lower abs, upper abs, and glutes.
How To Do
- Sit on a mat, flex your knees, and place your feet flat on the floor. Lean back and support your body on your elbows. This is the starting position.
- Lift both your legs off the floor and bring your knees almost close to your nose.
- Slowly, bring your legs down to the starting position. Do 3 sets of 15 reps.
Frequency: Perform 3-4 times per week.
Alternatives:
- Beginner: Keep feet closer to the floor for easier lifts.
- Intermediate: Perform the exercise without using elbows for support.
- Advanced: Add a twist by rotating your knees toward alternate shoulders.
What Not To Do
– Do not scrunch your shoulders or curve your lower back too much.
7. Sit-ups
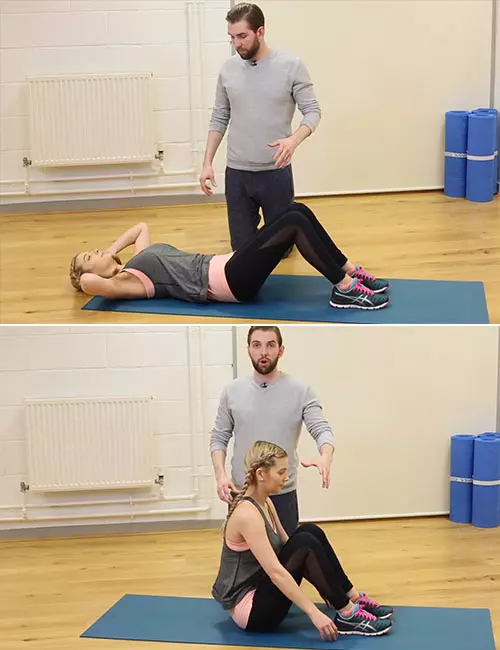
Target – Rectus abdominis
How To Do
- Lie on a mat, flex your knees, and place your heels on the mat. Engage your core and place your hands at the back of your head. Lift your head and shoulders off the floor and look at the ceiling. This is the starting position.
- Use your core strength to lift your body off the floor and come to a sitting position.
- Go back down to the starting position slowly. Do 2 sets of 12 reps.
Frequency: Perform 2-3 times per week.
Alternatives:
- Beginner: Use a stability ball while performing this exercise to support the lower back.
- Intermediate: Hold a light dumbbell or combine it with Russian twists.
- Advanced: Transition into full V-ups for a more dynamic movement.
What Not To Do
– Do not get confused between sit-ups and crunches. You need to literally sit up and go back down to the starting position to do sit-ups. Do not bring your elbows close while sitting up.
Sit-ups can put more stress on the spinal cord and lead to back pain. Hence, consult your fitness trainer before starting this workout.
8. Heel Touch
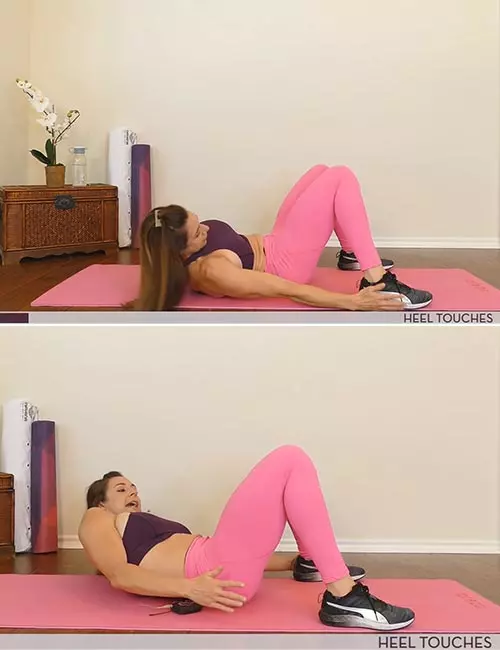
Target – Obliques and upper abs.
How To Do
- Lie down on a mat. Keep your legs flexed, feet wider than shoulder-width apart, and flat. Keep your hands by your side, chin up, shoulders relaxed, and core engaged.
- Bend sideways and try to touch your right heel with your right hand.
- Bend toward the other side and try to touch your left heel with your left hand.
- Do 20 of these to finish one set. Do 3 sets of 20 reps. Take a 20-second break before moving on to the next exercise.
Frequency: Perform 4-5 times per week.
Alternatives:
- Beginner: Perform side-to-side hand reaches without lifting your shoulders too high.
- Intermediate: Perform the exercise with a light resistance band looped around the waist.
- Advanced: Add small pulses at each side for greater oblique engagement.
What Not To Do
– Do not place your feet too close to your hips.
9. Jackknife Crunch
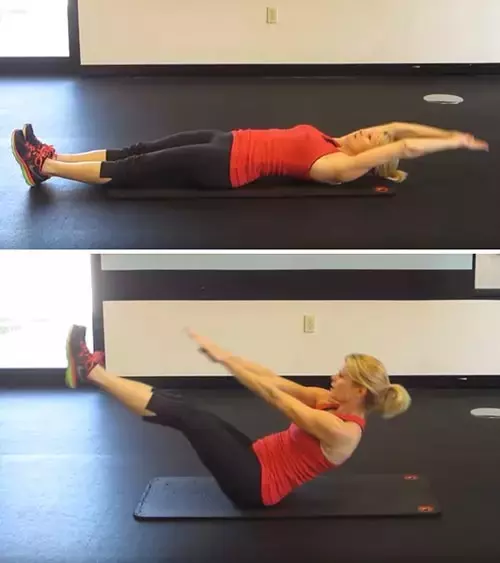
Target –Lower abs, upper abs, glutes, hamstrings, and quads.
How To Do
- Lie down on a mat. Extend your hands over your head. This is the starting position.
- Keeping your back and neck in the same line, lift your upper body using your core strength. Simultaneously, lift both your feet off the floor.
- Try touching your knees with your hands.
- Get back to the starting position. Do 3 sets of 12 reps.
Frequency: Perform 3-4 times per week.
Alternatives:
- Beginner: Focus on just lifting the legs or the torso, not both simultaneously.
- Intermediate: Hold a lightweight dumbbell with both hands while performing it.
- Advanced: Hold a medicine ball between your feet.
What Not To Do
– Do not rest your head on the floor completely between repetitions.
10. Russian Twist
If you are searching for what exercise burns the most belly fat right at home, these mean Russian twists are your answer.
Target – Obliques, upper abs, lower abs, and glutes.
How To Do
- Sit on the mat, lift both your legs, keep your knees flexed, and lean back a little. Join your palms to balance your body. This is the starting position.
- Twist your upper body to the left and then to the right.
- You may do 3 sets of 12 reps for best results.
Frequency: Perform 3-4 times per week.
Alternatives:
- Beginner: Keep your feet flat on the floor for stability.
- Intermediate: Hold a small weight or medicine ball.
- Advanced: Perform with feet off the floor and hold a weighted plate for resistance.
What Not To Do
– Do not hold your breath while doing this exercise.
 Did You Know?
Lunge twists are another great exercise for beginners who are looking to reduce belly fat at home. This lower body exercise improves the flexibility of the hips and strengthens the legs as well.
11. Lying Alternate Toe Taps
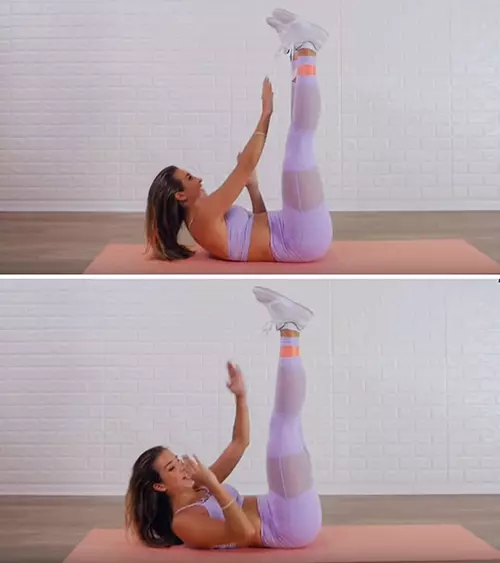
Target – Rectus abdominis, obliques, and glutes
How To Do
- Lie on the mat and lift both your legs at a 90-degree angle.. Extend your hand up, lift your head and upper back off the floor, and engage your core. This is the starting position.
- Curl up and try to touch your left foot with your right hand.
- Curl back down.
- Curl up again and try to touch your right foot with your left hand. Do 2 sets of 15 reps.
Frequency: Perform 3-4 times per week.
Alternatives:
- Beginner: Focus on tapping your thighs instead of toes.
- Intermediate: Extend the arms overhead for more range of motion.
- Advanced: Perform with your legs positioned closer to the floor.
What Not To Do
– Don’t worry if you are not able to touch your foot. Try reaching beyond the knee and as close to the foot as possible.
12. Crossbody Mountain Climbers
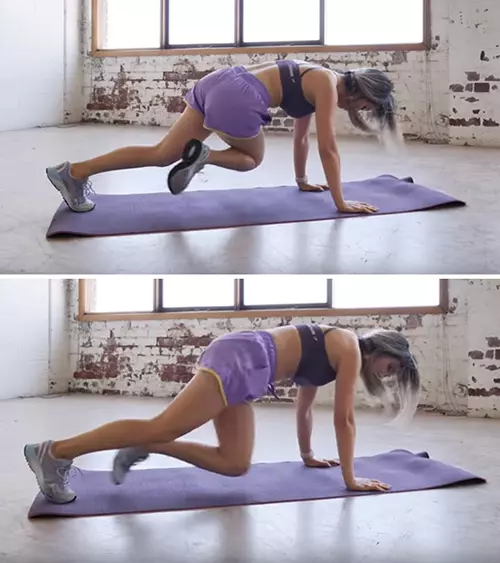
If you’re wondering how to lose belly fat, crossbody mountain climbers are a fantastic exercise to include in your regimen since they target various muscle groups and can raise your heart rate.
Target – Rectus abdominis, shoulders, core, glutes, hamstrings, and quads.
How To Do
- Get into a push-up position. Make sure your elbows are directly below your shoulders. Keep your neck, back, and hips in a straight line. Do not pike up and curve down. This is the starting position.
- Lift your right foot off the floor, flex your knee and bring it close to the right side of your chest.
- Place the right foot back to its starting position. Now, lift your left foot off the floor, flex your knee and bring it close to the left side of your chest.
- Speed up and do it as if you are running! Do 2 sets of 25 reps. Take a 20-second break before doing the next exercise.
- You can wear a resistance band on your ankles for advanced resistance training.
Frequency: Perform 4-5 times per week.
Alternatives:
- Beginner: Perform at a slower pace, pausing after each rep.
- Intermediate: Increase your speed without losing form.
- Advanced: Loop a resistance band around your feet to make it more challenging.
What Not To Do
– Do not place your palms too far away from your body, and do not droop your neck or lower back.
13. Burpees
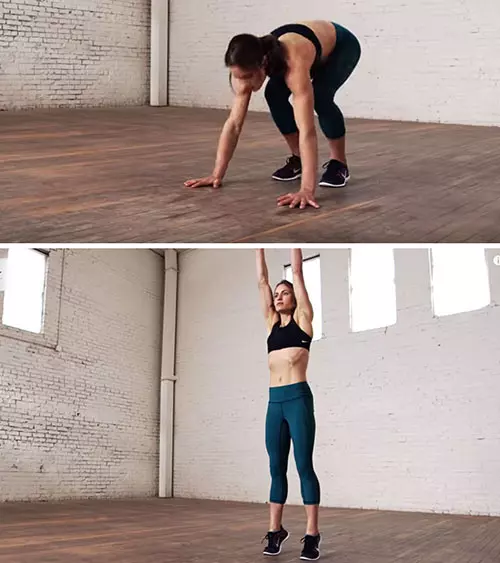
Target – Full body workout that also targets your abs.
How To Do
- Stand straight with your feet shoulder-width apart.
- Bend your knees and place your hands on the floor. Let’s call this the “frog” position for clarity.
- Jump and push both your legs back and get into a plank or push-up position.
- Hop and get back to the “frog” position.
- Jump vertically and extend your hands above your head.
- Land softly on the floor.
- Get into the frog position again, then go back to the plank position. Do 3 sets of 8 reps. Take a 10-second break between the sets. Also, take a 20-second break before moving on to the next exercise.
Frequency: Perform 3-4 times per week.
Alternatives:
- Beginner: Remove the jump and focus on stepping back into a plank.
- Intermediate: Add an extra step and do a push-up before returning to the frog position.
- Advanced: Add a tuck jump or hold weights for extra difficulty.
What Not To Do
– Do not set unachievable goals. Burpees are tough to do. The number of burpees you do does not matter. What matters is how many you do while maintaining correct posture.
14. Plank
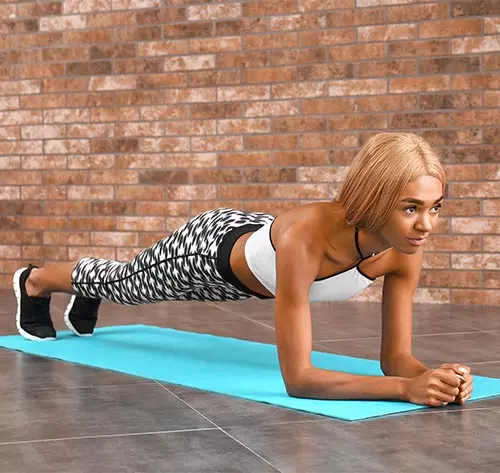
For those who prefer at-home workouts, focusing on exercise to reduce belly fat for females at home can make a big difference. Options like planks, heel touches, and side planks are not only easy to perform but also highly effective in toning the midsection. While there is no research suggesting that plank alone helps reduce belly fat, most people believe it to be one of the best workouts, as the plank primarily targets your core muscles.
Target – Rectus abdominis, core, shoulders, biceps, and glutes.
How To Do
- Kneel down on a mat.
- Place your elbows on the mat.
- Extend your right leg back, then your left leg.
- Keep your neck, back, and hips in the same line. Keep your core engaged.
- Hold this pose for at least 30 seconds. Do 3 sets of 30-60 seconds hold.
Frequency: Perform daily or at least 4-5 times per week.
Alternatives:
- Beginner: Perform the exercise on the knees instead of the toes.
- Intermediate: Add shoulder taps or leg lifts.
- Advanced: Incorporate side planks or weighted planks to increase the intensity.
What Not To Do
– Do not place your palms far away from your shoulders. Do not droop your lower back or pike it up.
15. Side Plank
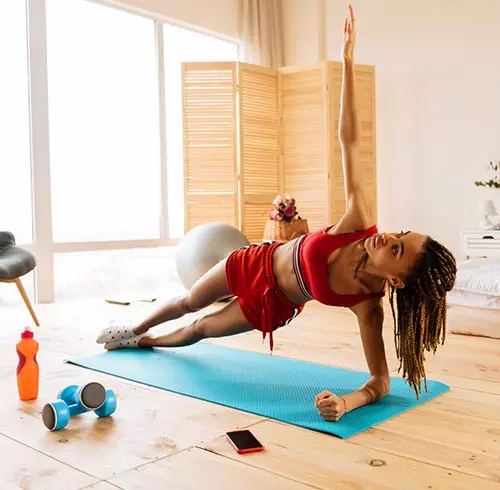
Target – Abs and core, shoulders, biceps, and glutes.
How To Do
- Get into a side half-lying pose on your right. Place your left foot across the right foot and on the floor.
- Place your elbow right below your shoulder and your left hand on your waist.
- Lift your pelvis off the floor. Your back should be in line with your neck and head.
- To make this a little tough, open your left hand wide.
- Hold this pose for 30-60 seconds. Keep breathing.
- Lower your body. Take a 10-second break, change sides, and do the same on the other side. One set of this exercise is enough for beginners. You may increase the time and sets as you progress.
Frequency: Perform 4-5 times per week.
Alternatives:
- Beginner: Keep the knee of the bottom leg on the ground for additional support.
- Intermediate: Do a hip dip during the hold.
- Advanced: Extend your top leg or hold a weight in your top hand.
What Not To Do
– Do not droop your pelvis.
16. Walking
Walking is an effective exercise that aids in burning calories and reduces overall body fat, including belly fat (3). It boosts metabolism, strengthens muscles, and improves cardiovascular health, contributing to fat loss. By engaging in regular speed walking, you can lose persistent belly fat, which can lower the risk of obesity-related health issues, such as heart disease and diabetes (4).
Target – Visceral fat; deep abdominal fat that surrounds vital organs.
How To Do
1. Begin with a moderate pace, gradually increasing your speed.
2. Aim for at least 30 minutes of brisk walking most days of the week.
3. Maintain an upright posture and engage your core muscles while walking.
4. Incorporating walking into your lifestyle, such as walking to work.
Frequency: Aim for at least 30 minutes of brisk walking 5-6 times per week.
Alternatives:
- Beginner: Start with shorter, slower walks.
- Intermediate: Incorporate light jogging intervals.
- Advanced: Add hills or wear a weighted vest for increased intensity.
If you have physical limitations, such as wrist pain or lower back issues that make exercises like mountain climbers or crunches uncomfortable, there are many alternative exercises you can try. For instance, if mountain climbers put too much strain on your wrists, you can perform standing high knees, a similar cardio workout. Similarly, if crunches cause discomfort, opt for standing oblique twists or lying leg raises, which are gentler on the back. However, it is always best to consult a healthcare professional or a certified fitness trainer to understand what kind of alternatives you can incorporate based on your specific limitations. They can help create a safe and effective workout plan tailored to your needs.
These are some of the effective exercises for reducing belly fat at home. However, these belly fat exercises also may cause certain adverse effects. Being informed about them is important. Scroll down to know more.
Key Takeaways
- Belly fat may increase one’s risk of diabetes and heart disease.
- You can reduce belly fat by following some simple exercises at home.
- Crunches, scissor kicks, heel touches, and Russian twists are a few that can help.
These are some of the effective exercises for reducing belly fat at home. However, if you are a beginner or planning to incorporate these exercises into your existing routine, understand the mechanism behind them and how they work.
Science Behind Losing Belly Fat
Remember, spot reduction—the idea of targeting fat loss in a specific area like the belly—is a common misconception. The human body does not work that way; when we lose weight, our body decides where the fat comes from, and it is not always the area we want.
While crunches and other ab exercises can strengthen your core muscles, they won’t directly target belly fat. To reduce belly fat, you need to focus on overall fat loss. This involves a combination of a healthy diet and regular exercise. A review of several studies published in the journal Diabetes & Metabolic Syndrome evaluated obesity management strategies in adults, focusing on diet and exercise. The review concluded that while exercises can strengthen core muscles and improve health, reducing weight requires a combination of cardiovascular activity, strength training, and dietary adjustments. A minimum of 175 minutes of exercise per week with a tailored low-calorie diet is most effective (5). Thus, a balanced diet rich in fruits, vegetables, lean proteins, and whole grains can help you maintain a healthy weight and reduce belly fat.
A study published in BMC Public Health examined the impact of equivalent weight loss through diet alone versus diet combined with exercise on abdominal fat. It involved 97 overweight women and found that both approaches reduce subcutaneous and intra-abdominal fat, with greater fat reduction observed in the group that combined exercise with dietary restriction. The findings highlight the additional benefits of exercise in targeting specific fat deposits, even when weight loss is comparable across methods (6).
With this in mind, you can plan your workouts with a mix of these belly fat exercises, strength training, cardio, and a balanced diet. If you are a beginner and want to know how to plan, here is a sample plan of the workouts to lose belly fat at home.
Weekly Exercise Schedule To Reduce Belly Fat At Home
Here is a simple workout plan designed to help you get started with exercises to lose belly fat at home for beginners. This plan combines core-strengthening moves and cardio to ensure a holistic fitness routine.
Monday: Core Strength + Cardio
- Plank Hold: 3 sets, 30-60 seconds each.
- Russian Twists: 3 sets of 20 reps (10 per side); add weight for more intensity.
- Bicycle Crunches: 3 sets of 15-20 reps.
- Mountain Climbers: 3 sets, 30 seconds each.
- Cardio: 20-30 minutes of brisk walking or light jogging.
Tuesday: Lower Body + Core
- Leg Raises: 3 sets of 12-15 reps.
- Reverse Crunches: 3 sets of 12-15 reps.
- Squats: 3 sets of 15-20 reps.
- Glute Bridges: 3 sets of 10-15 reps, hold the top position for a few seconds.
- Light Cardio or Stretching: 15-20 minutes.
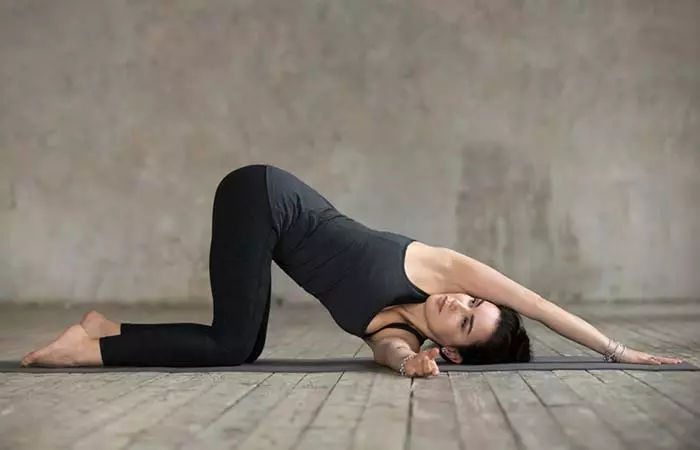
Wednesday: Active Recovery or Stretching
- Cat-Cow Pose: 5 minutes.
- Child’s Pose: Hold for 30 seconds, repeat 3 times.
- Sun Salutations: 5 rounds for flexibility and core strength.
- Optional: A 15-minute walk.
Thursday: Upper Body + Core
- Push-ups: 3 sets of 10-15 reps (knee push-ups as needed).
- Side Plank: 3 sets per side, hold for 20-40 seconds.
- V-Ups: 3 sets of 10-15 reps.
- Mountain Climbers: 3 sets, 40 seconds each.
- Cardio: 20 minutes of cycling or jumping rope.
Friday: Cardio + Full Body
- Burpees: 3 sets of 8-10 reps.
- Jumping Jacks: 3 sets, 50 seconds each.
- Lunges (Forward or Reverse): 3 sets of 10 reps per leg.
- Plank With Shoulder Taps: 3 sets of 15 taps per side.
- Cardio: 30 minutes of steady running or elliptical.
Saturday: Core Focus
- Hanging Leg Raises (if equipment is available): 3 sets of 8-12 reps.
- Oblique Crunches: 3 sets of 15 reps per side.
- Flutter Kicks: 3 sets, 30 seconds each.
- Side Plank Dips: 3 sets of 12 dips per side.
- Stretching: 15 minutes for recovery.
Sunday: Rest or Recovery
- Optional: 20-30 minutes of walking, stretching, or yoga.
Key Points To Consider:
- Warm-Up: Start each workout with 5-10 minutes of dynamic stretches or light cardio to prepare your body.
- Cool Down: End your workout routine with 5-10 minutes of static stretching to improve flexibility and reduce muscle soreness.
- Progression Overload: Gradually increase the exercise intensity, number of reps and sets, or resistance of your workouts every 1-2 weeks as you progress.
- Hydration: Stay hydrated by drinking plenty of water and eat a balanced diet to fuel your body and get optimal results.
Remember, patience is key. Sustainable weight loss takes time and effort. However, these also may cause certain adverse effects. Being informed about them is important. Scroll down to know more.
Potential Side Effects Of Exercises That Target Belly Fat
Here are some potential side effects of exercises targeting belly fat:
- Injuries
- Back pain
- Neck pain
- Muscle strain
- Joint pain
- Shoulder pain